Create corrective maintenance work orders to track the repairs needed for equipment. For information on generating Preventive Maintenance work orders, please see Generating PMs.
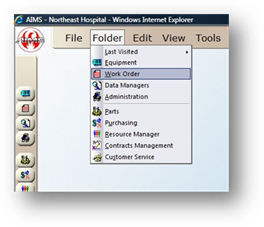
1. Open the Work Order Control by clicking on the Work Order button from the main screen or by selecting from the menu Folder >Work Order.
Request Tab
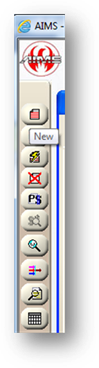
2. Click New.
•The Work Order Number automatically generates as the next available number.
NOTE: Work Order Numbers cannot be changed.
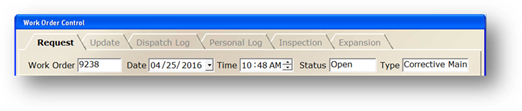
•Date, Time, Status, and Type will default based on system defaults.
•For more information, please see Administrative Defaults.
Reason
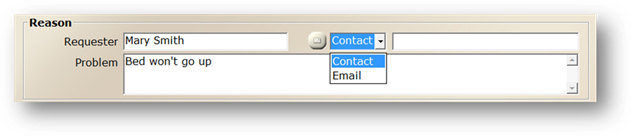
3. Select the Requester from the valid entry list or enter the individual requesting the work order as free-form text.
NOTE: The list is populated from the Customer Service Address Book within AIMS. You are not required to select an entry from the list.
NOTE: You can configure AIMS to automatically add new entries to the customer service address book.
4. Click the Send Email button to have a Customer Service form sent to the requester or department’s main contact when the work order is saved.
NOTE: The button will display a red flag when this option is selected. Based on your system setup, this may default to being checked.
5. The Contact and Email information default based on the requester. You can accept the default information or change it.
6. Enter the Problem description as reported by the customer or the reason for the work order.
Item Information
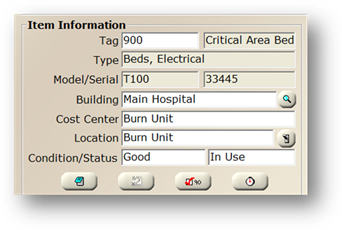
7. Enter the Tag Number (if applicable) or find the Tag by using the Zoom or Find Feature indicated by the magnifying glass in the toolbar. Once a Tag Number is entered, press Tab. The rest of the equipment information will default.
NOTE: When a Tag Number is entered, messages may be received indicating if the Tag Number is under contract, under warranty, or has additional work orders open. The information associated with the messages can be viewed by clicking Yes.
8. Select the equipment Type from the valid entry list.
NOTE: The Equipment Type field is view-only if an equipment tag number was entered.
•The Model/Serial field is read-only, and will populate after the Tag Number is entered.
9. Accept the Building default, select a Building from the valid entry list, or click the Zoom button to open a dialog to search for a Building.
10. Accept the Cost Center default, select a Cost Center from the valid entry list, or click the Zoom button to open a search dialog box. This is the department requesting work to be done.
11. Accept the Location default or select a Location from the valid entry list.
NOTE: The Switch button is available if your organization has set up the location hierarchy option.
12. Select the equipment Condition from the valid entry list, if applicable.
•Status will default from the Tag Number entered on the Work Order.
NOTE: If a Tag Number’s status is changed in the work order control, a dialog will ask you if you would like to update the equipment’s status.
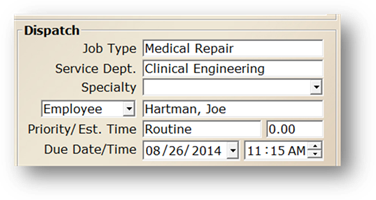
Dispatch
Non-PM Work Order
PM Type Work Order

13. Select a Job Type from the valid entry list, if applicable.
•This is used to classify the nature of work that is being requested and may default the estimated time.
NOTE: If the Work Order Type is a PM Type work order, this field will be labeled Procedure.
NOTE: When a Job Type is entered a message may be received indicating if the Job Type is under contract,
14. Accept the Service Department default or select one from the valid entry list. Each work order must have a service department.
15. Accept the Specialty default or select one from the valid entry list, if applicable.
16. Select Employee or Provider from the drop down list.
17. To assign the work order to a specific technician or service provider, select a Specific Employee or Provider from the valid entry list.
NOTE: If set as a required field, it is not required for PM work orders.
18. Accept the Priority default or select from the valid entry list.
•Priority can be configured to automatically set the work order due date and time.
19. Accept the Estimated Time default or enter an estimated time to perform the requested service.
•Estimated Time may default based on the job type or priority entered.
20. Accept the Due Date/Time default or select a date the work is to be completed or closed.
•The Due Date/ Time may default based on priority.
•Due time will default to 11:59 PM for PM work orders.
21. Accept the Compliance Date default or select a date.
NOTE: This does not apply to CM work orders.
22. When entries are completed, click Save to continue. Depending on system defaults, the work order may print.