 Or….
Or…. 
Equipment PM Schedules determine what procedures and tasks are performed on a specific piece of equipment and how often the procedure will be performed.
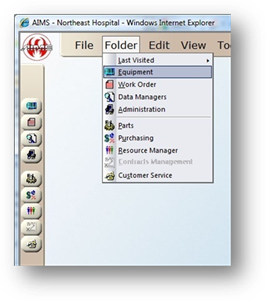
1. Open the Equipment Control by clicking the Equipment button in the toolbar, or selecting Folder > Equipment.
 Or….
Or…. 
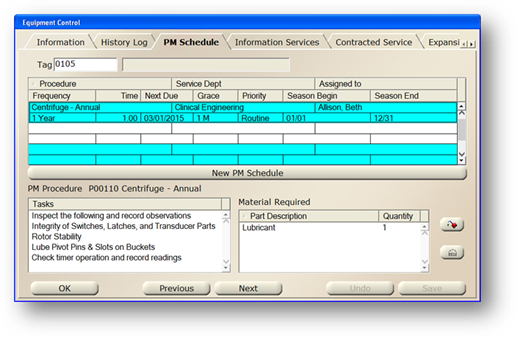
2. Select the PM Schedule Tab.

3. Enter the Tag Number of the equipment the PM Schedule will be added to and press Tab.
4. Click the New button in the toolbar on the left side of the screen or click the New PM Schedule button.
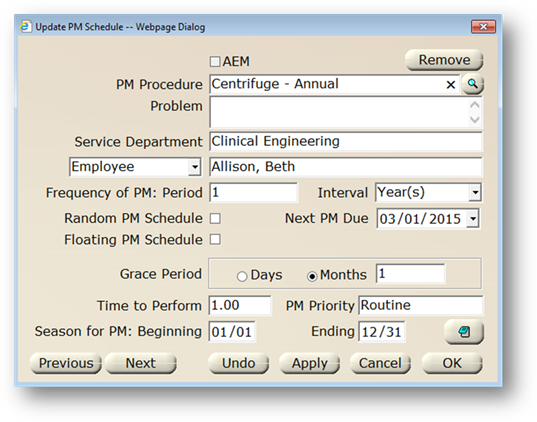
Update PM Schedule

5. Select a PM Procedure from the valid entry list.
⋅ Service Department and Assigned Employee may default.
6. Check AEM if this is an Alternative Equipment Maintenance Schedule.
7. Enter text to populate the “Problem” field on the generated PM Work Order. If left blank, the standard text will appear.
8. Select the Service Department assigned to PM work orders for this equipment.
9. Select Employee or Provider from the valid entry list, depending on whether this PM is performed by an In-House Employee or an Out-Sourced Service Provider.
10. Enter the Frequency, or how often this PM will be performed.
⋅ Select an Interval Unit from the drop down list. The Frequency and the Interval will determine how often the PM will be performed.
11. Check the Random PM Schedule box to configure the PM schedule as random.
NOTE: Random PMs do not have a schedule date and are NOT generated using the Generate PMs function in the Work Order control.
12. Check the Floating PM Schedule box if the PM will have a floating schedule. The next PM Due Date for a floating PM is not updated until the previous PM work order is closed.
13. Set the Next PM Due Date to the date the next PM should be generated. If grace periods are used, the actual work order due date will be the work order request date plus the grace period.
14. Enter a Grace Period (if applicable or permitted). This determines the due date on the work order, which will be the “Next Date” plus the grace period you enter.
⋅ Select the Days or Months radio button and enter a number to provide additional time to complete the PM work order without being flagged as overdue or late.
NOTE: One month will make the PM due at the end of the month in which the PM is generated, not one month from the next PM due date.
15. Accept the default or enter the Time to Perform the PM. This will set the estimated time for completion on the work order.
16. Select a PM Priority from the valid entry list. This will display on the PM work order. This field is generally for reporting purposes only.
NOTE: PM due dates default based on the grace period (if entered). Use priority for PMs that require special attention or should be performed first.
17. Enter the Season for PM Beginning and Ending dates for PMs that are not performed year round.
NOTE: PM work orders will not generate for dates outside the Seasonal dates.
18. Click the Note button to add a note to the PM Schedule.
NOTE: To display the note on work orders, click the Include with Printed PMs checkbox.
19. Click OK to save the new PM schedule and exit the Screen.