 Or….
Or…. 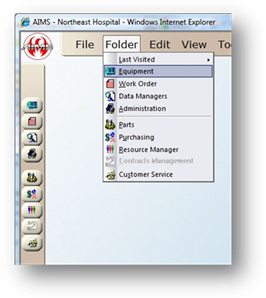
Metering PM Schedules determine which procedures and tasks are performed on a specific piece of equipment determined by cycles since the last PM.
1. Open Equipment Control by clicking the Equipment button in the toolbar, or selecting Folder > Equipment.
 Or….
Or…. 
2. Select the PM Schedule Tab.
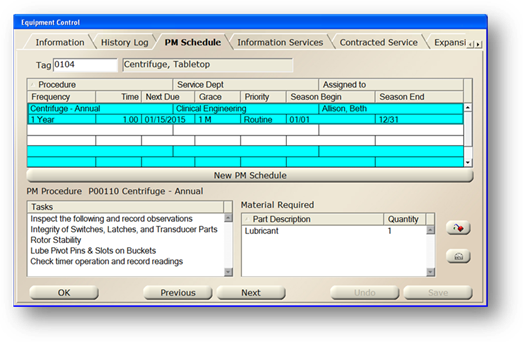
3. Enter the Tag Number of the equipment the PM Schedule will be added to and hit Tab.
4. Click the New button in the toolbar on the left side of the screen or click the New PM Schedule button.
Update PM Schedule by Meter
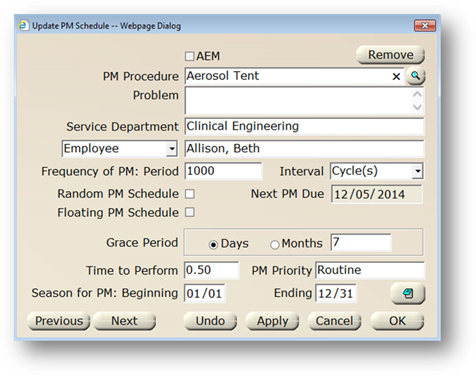
5. Select a PM Procedure from the valid entry list.
⋅ Service Department and Assigned Employee may default.
6. Check AEM if this is an Alternative Equipment Maintenance Schedule.
7. Enter text to populate the “Problem” field on the generated PM Work Order. If left blank, the standard text will appear.
8. Select the Service Department assigned to PM work orders for this equipment.
9. Select Employee or Provider from the valid entry list, depending on whether this PM is performed by an In-House Employee or an Out-Sourced Service Provider.
10. Enter the Frequency, or how often this PM will be performed.
⋅ Select the Interval Unit of Cycles(s). The Frequency and the Interval will determine how often the PM will be performed.
11. Click the Note button to add a note to the PM Schedule.
NOTE: To display the note on work orders, click the Include with Printed PMs checkbox.
12. Click OK to save the new PM schedule and exit the Screen.
⋅ PM Work Orders will be generated based on the hour or cycle entries of work orders.
Metering Setup
Once the equipment has a defined PM based on cycles assigned to it, the meter requires an initial entry.
1. The Meter button will become available for PM Procedures assigned to cycles. Click on the Meter button on the PM Schedule tab.
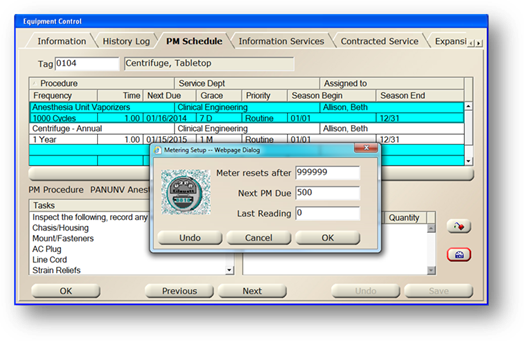
2. Enter the Meter resets after - Accept the default or enter a new reset reading.
3. Enter Next PM Due - Accept the default based on PM Frequency or enter the Next PM Due value that will trigger a PM when a technician enters the value on a CM work order.
4. Enter Last Reading - Enter the last reading or leave blank.
5. When entries are completed, click on Ok to return to the File.
NOTE: The system maintains the Last Reading through work order entries.