Inspections can be set up for opening/closing multiple work orders for similar equipment. For instance, an inspection can be set up for Fire Extinguishers, which would allow you to perform the inspection, and then upon completion run the Open/Close function to create a work order, apply time, and close a work order for each fire extinguisher in the facility. This saves time over manually opening each work order, applying time, and closing.
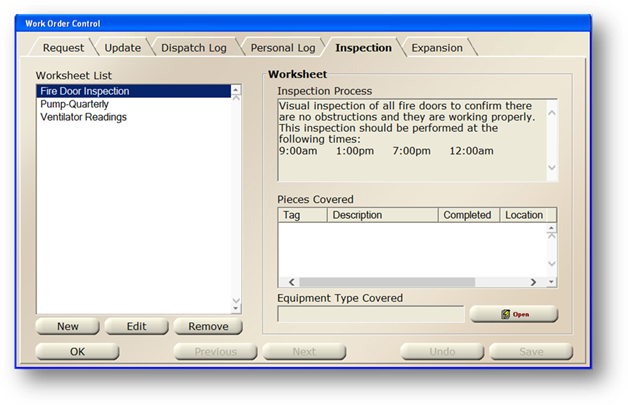
1. Open the Work Order Control by clicking Work Order from the main screen or using the menu Folder> Work Orders.
2. Click the Inspection Tab.
3. Click New.
4. Choose a Layout for the worksheet.
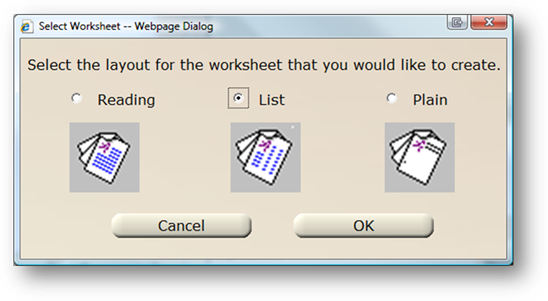
•Reading – Includes a field to enter reading information from a device, if taking a reading off of the equipment you are inspecting as well as a field for the Next PM Due.
•List – A list allowing for entry of inspection results for each tag on the inspection worksheet.
•Plain – A simple printout of the inspection steps, without individual tag information.
5. Click OK
Create/ Update Worksheet Dialog
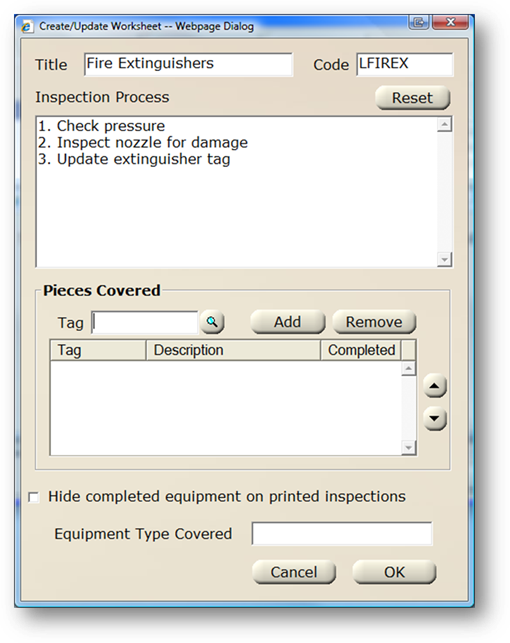
6. Enter a Title for the Inspection (Example: Fire Extinguisher – Monthly)
7. Press Tab and accept the AIMS Generated Code or enter one of your own.
8. Enter the Inspection Process. These are the numbered steps that are performed for each item when doing the inspection.
Pieces Covered
9. Enter a Tag Number for the equipment for the inspection.
NOTE: You can search for multiple pieces of equipment by using the Find button and entering search criteria (such as equipment type) in the find dialog. Select multiple tags at once by dragging the mouse or using the Shift/CTRL keys.
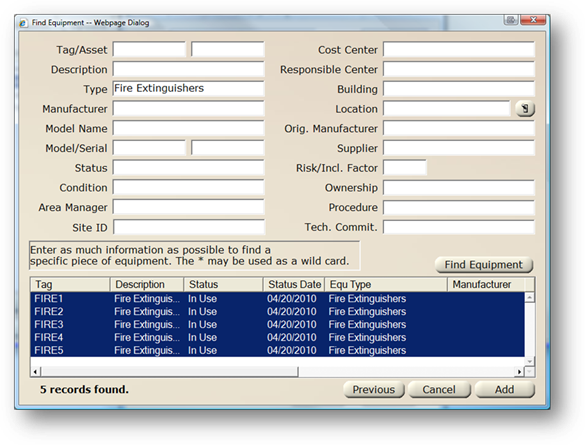
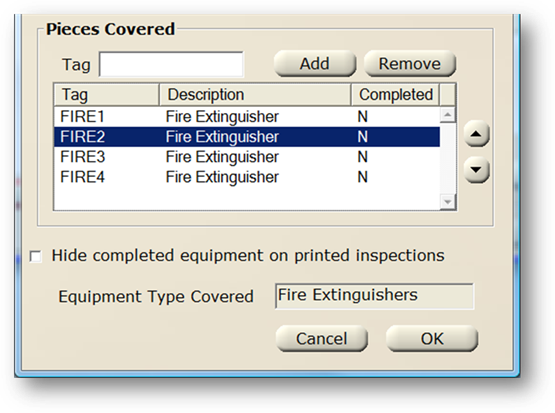
Alternatively, choose an equipment type from the Equipment Type field. This will automatically put all equipment of that type in the inspection. You will not be able to use the “Hide completed equipment on printed inspections” option if you create an inspection by type instead of individual tags.
10. Click Add to add the Equipment to the Inspection List.
11. Repeat steps 9 and 10 for each Tag / Equipment needed on the Inspection.
12. Use the up/down arrows to adjust the order of equipment on the inspection. This is useful if you want the equipment to appear on the printout in “walk order”; or the order in which you would visit each device while physically walking the hospital.
13. Click Hide completed equipment on printed inspections if you do not want equipment to show up on the printout if it already has been inspected. If checked, only equipment that has not been inspected will appear on the printed inspection.
14. Click OK to save the Inspection.