1. Log into EasyNet Plus. The Home screen is displayed.
NOTE: Depending on your setup, you may not be required to log in to submit EasyNet Plus work orders.
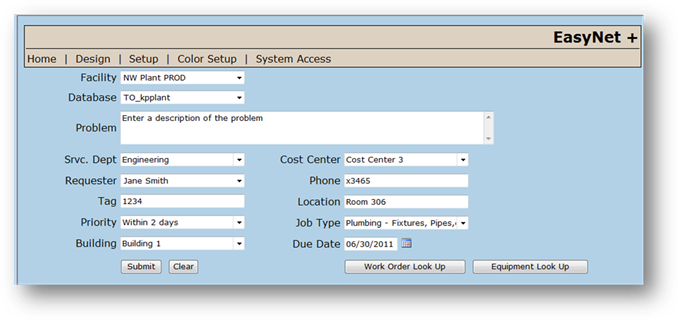
Your screen layout may differ from the example below. Not all fields shown may be available to you.
2. Accept the Facility default or select from the valid entry list. (CCS systems only)
3. Select a Database from the list if your facility has more than one AIMS database. [i.e. Clinical Engineering and Plant Engineering.].
4. Enter a description of the Problem, up to 500 characters.
5. Accept the Service Department default or select from the valid entry list.
6. Select the Requester from the valid entry list or enter the Requester name.
7. Enter the Tag Number.
8. Accept the Priority default or select from the valid entry list. This may cause the due date to change automatically.
9. Accept the Building default or select from the valid entry list.
10. Select a Cost Center from the valid entry list.
11. Enter the Requester Phone Number and/or Extension.
12. Enter the Equipment Location using free form text.
13. Select a Job Type from the valid entry list.
14. Enter the Expected Due Date on which the work must be completed.
15. After you have entered the appropriate values for each field, click Submit.
⋅ To clear a Work Order Form, click Clear before it is submitted.