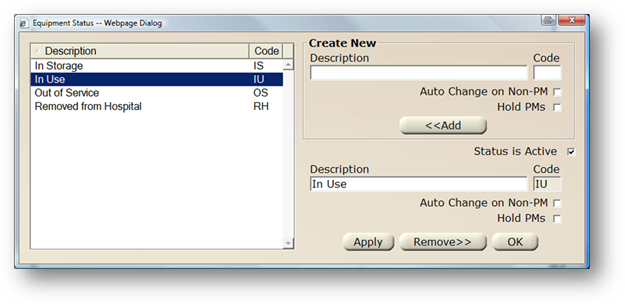
1. Click Status and the dialog opens.
2. To enter a new status, enter a Description for a new equipment status in the Create New section and press Tab.
3. Accept the Code default or enter a two character code.
4. Check Auto-Change on Non-PM to automatically change to the System Default equipment status when a corrective maintenance (Non-PM) work order is created.
EXAMPLE: If equipment is under an In Storage Status and a CM is created for it, the status will be changed to In Use automatically, provided In Use is the system default. If the tag does not have a PM Schedule, and the logged in user has security to add one, user will be prompted to assign one if desired.
5. Check Hold PMs if you do not want to generate PMs when equipment is under this status. This is especially important for your “out of service” or “retired” statuses.
6. Click Add to add the New Equipment Status.
NOTE: Status is Active and is automatically checked as active. Active statuses display as options in valid entry lists; inactive do not.
7. To edit existing entries, highlight an entry in the list. Make changes in the lower right section and click Apply.
8. Click OK to close the Equipment Status dialog.