1. Open the Parts Control by clicking on Parts from the main screen or by using the menu Folder > Parts.
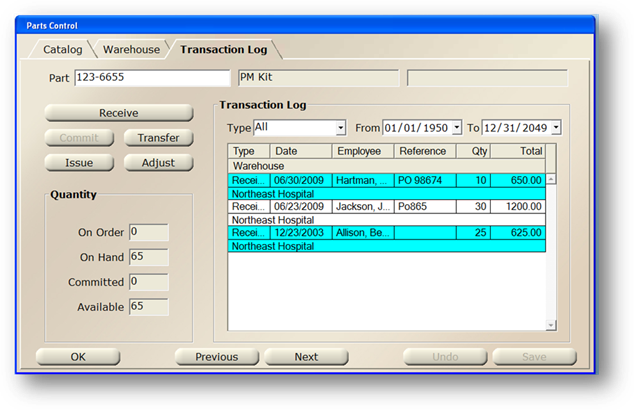
2. Click on Transaction Log Tab.
Transaction Log Tab
3. Enter AIMS Part Number and [Tab].
4. Click Receive.
Receive Quantity Dialog
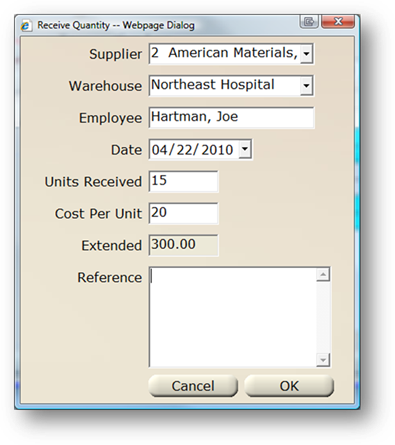
5. Select the Supplier that the Part was received from. This list will be populated from the Suppliers added to the Part when the Part was entered into AIMS. For more information, see Adding Parts.
6. Select the Warehouse that the Part was received into.
7. Select the Employee that received the Part from the valid entry list.
8. Accept the Date default (current system date), enter a new date, or use the calendar to select a date.
9. Enter the Units Received.
NOTE: The Units received will be multiplied by the Quanity Per Unit defined in the Supplier dialog on the Catalog File for the part being received.
10. Enter the Cost per Unit received. If more than one part is included in a Unit, AIMS will divide the Unit Cost across the Parts in the Unit to come up with the Individual Part Cost.
11. The Extended Field displays the total cost.
12. Enter additional information to be displayed in the Reference Field of the Parts Transaction Log file.
13. Click OK to add parts to the inventory and close the Receive Quantity dialog.
14. Alternatively, you can click Cancel to discard entries and exit.