Once one or more line items on a purchase order have been received, you can enter invoices on them.
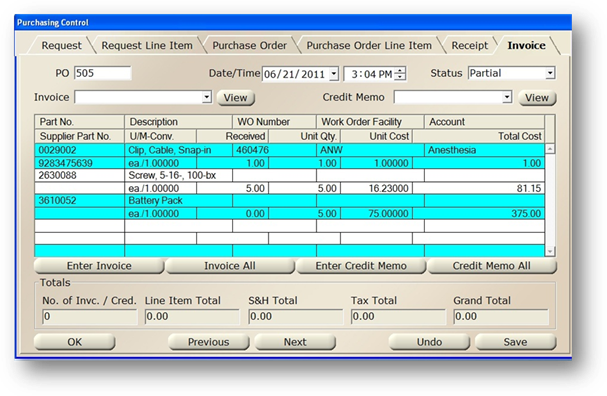
1. Open the Purchasing Control
2. Click the Invoice tab
3. Select one or more line items and click Enter Invoice. To include all line items on the same invoice, click Invoice All.
Invoice Detail
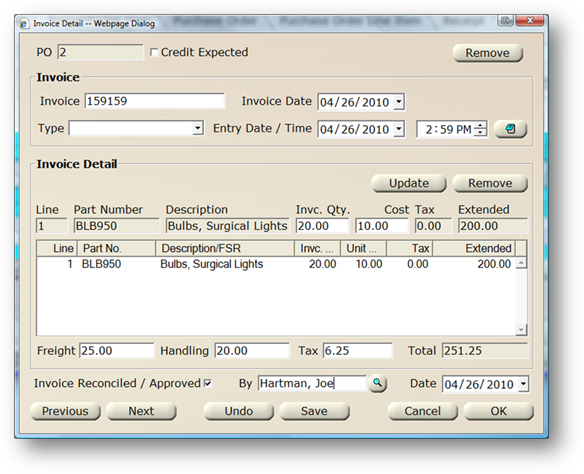
4. Enter the Invoice number
5. Accept the default of today’s date, or enter the Invoice Date. This should reflect the date of the actual invoice.
6. Accept the default of today’s date or enter the Entry Date / Time. This should reflect the day and time the invoice information was entered into AIMS.
7. Click the Note button to enter miscellaneous notes on the Invoice.
8. Click a line item in the table
9. Enter the Invc. Qty. and Cost. These should be the values shown on the Invoice.
10. Click Update to modify the information on the line in the table.
11. Enter the Freight
12. Enter the Handling
13. Enter the Tax
14. To flag the Invoice as reconciled or approved, click the Invoice Reconciled / Approved checkbox and choose the person approving the invoice from the valid entry list along with the approval Date.
15. Click OK to save the Invoice information and return to the Purchasing control.