The Export to Excel function allows you to export user defined data to a Microsoft Excel spreadsheet. From there, you can manipulate the data using Excel’s built in features and functions.
NOTE: In order for Export to Excel to function properly, you must first configure Internet Explorer by going to Tools > Internet Options > Security > Custom Levels > Downloads and enable Automatic Prompting for Downloads and File Downloads. Please consult your IT staff for assistance.
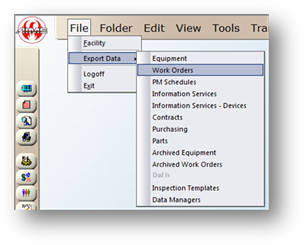
1. Go to File > Export Data.
2. Choose the Type of Data you want (Equipment, Work Orders, etc.).
Export
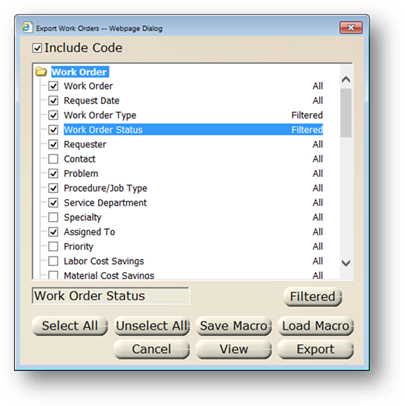
3. Check Include Code if you want the output to always include both the Description and Code for all valid entry (coded) fields. Otherwise only the Description will be displayed.
4. Select the Fields you want to include in the output by clicking the checkboxes next to each field.
5. To Filter the data, select the Field you want to Filter on and click the All button. From the resulting dialog box, enter the Filter Parameters.
NOTE: Depending on the nature of the field you are filtering on, the filter dialog box will either allow entry of a range, a selection from a list, or selection of a date range.
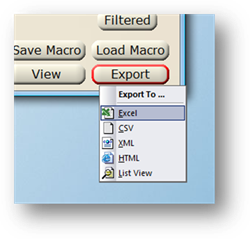
6. Click Export and select the Format for the Data to be exported.
7. If the Data being Exported may be reused, the configuration can be saved to be used later, saving time in setting up the Export.
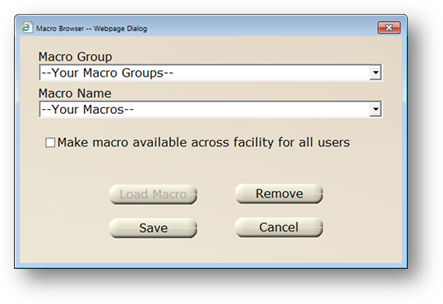
8. To save an Export Macro, click Save Macro.
9. Enter a new Macro Group Name or select an existing Macro Group to assign it to that group.
10. Enter a Macro Name or select an existing Macro Name for the Macro.
11. You can choose to make the macro available to all users in that facility by enabling Make macro available across facility for all users.
12. Click Save.